Send forms to Cobra
For the handover to cobra, it's best to set up the form directly in the form editor. This way, the configuration stays where the fields and checkboxes are edited.
Create form
Create in the area Forms a new form. The template is suitable as an example Modern Preferences, because it combines contact details and multiple topic checkboxes.
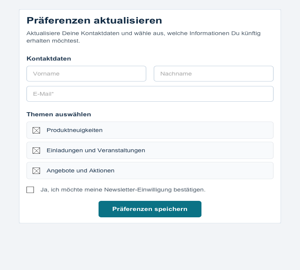
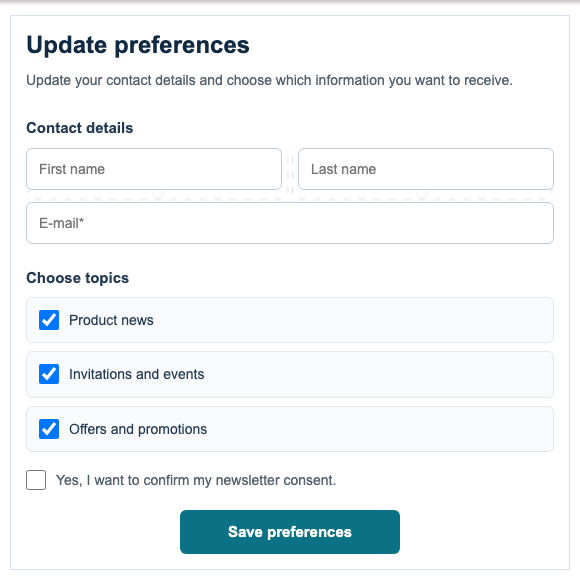
The template already contains typical fields for the cobra handover: email address, first name, last name, and several checkboxes for interests or distribution lists. Save the form after creating it so that mailfino can link it with the cobra integration.
2. Select connection in the form
Then open the form properties. In the area Connections Select the cobra connection that should process this form.
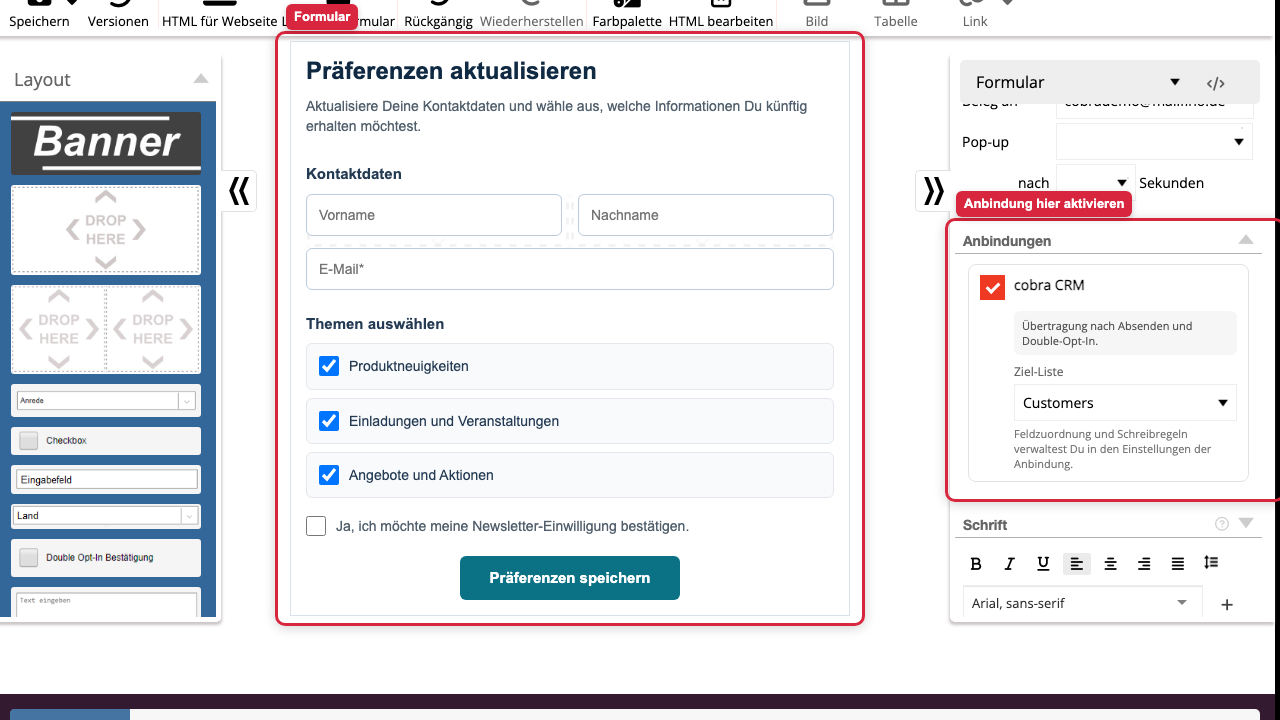

When the form is activated, mailfino passes new submissions to cobra. The timing is automatically adjusted according to the form's opt-in mechanism:
- With single opt-in, it is transmitted after sending.
- With mandatory Double Opt-In, data is only transferred after confirmation.
- With optional double opt-in, the transfer can occur after submission and after confirmation.
You do not need to select this rule additionally in cobra. mailfino will adopt it from the form.
3. Assign fields
Select an input field in the form, for example First name. On the right, the area appears in the properties External Connections. There, in the field Target field, into which cobra field the value should be written.
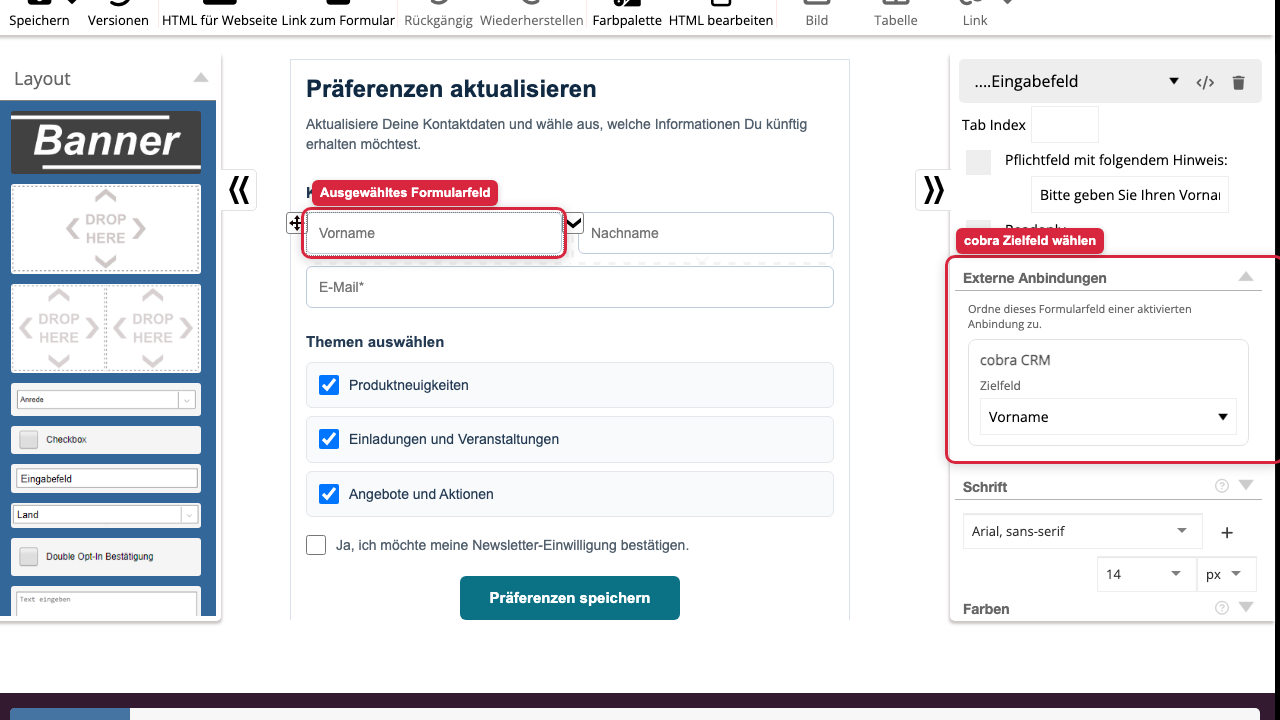
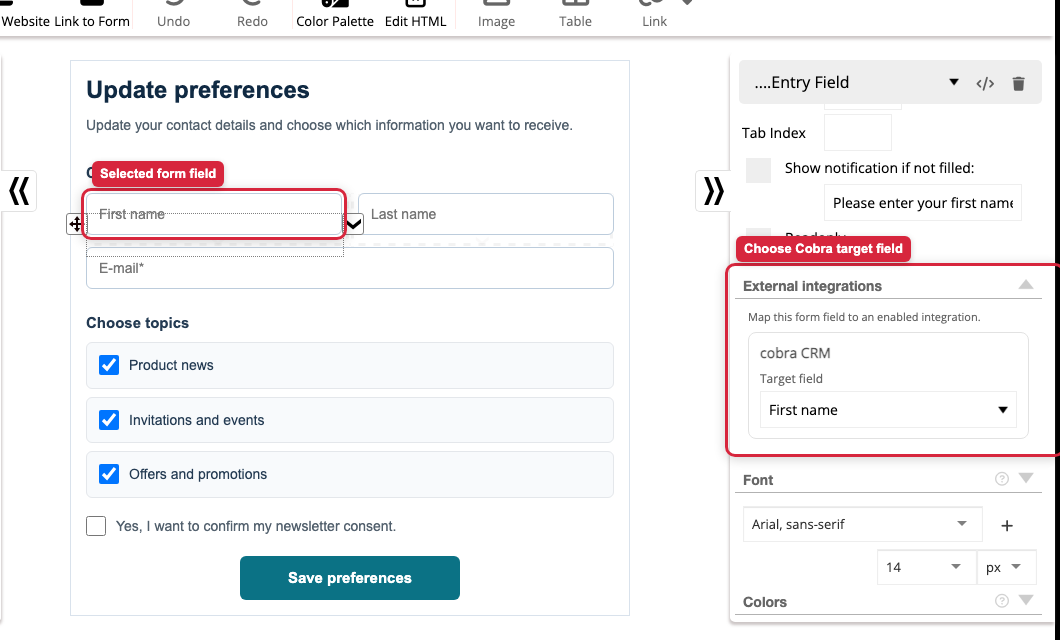
For the template Modern Preferences are primarily these assignments meaningful:
- Email address to email
- First name First name
- Last name too Last name
- optional Company, Phone, or Location, if you expand the form to include these fields
If you do not select a target field for a field, the global field mapping from the cobra connection will be used. Explicitly select No field, if a form field should not be transferred to cobra.
4. Assign checkboxes to Cobra lists
The template's topic checkboxes can also populate cobra lists. To do this, select a checkbox, for example, Product News. In the area External Connections Select cobra connection and desired cobra list under the list action.
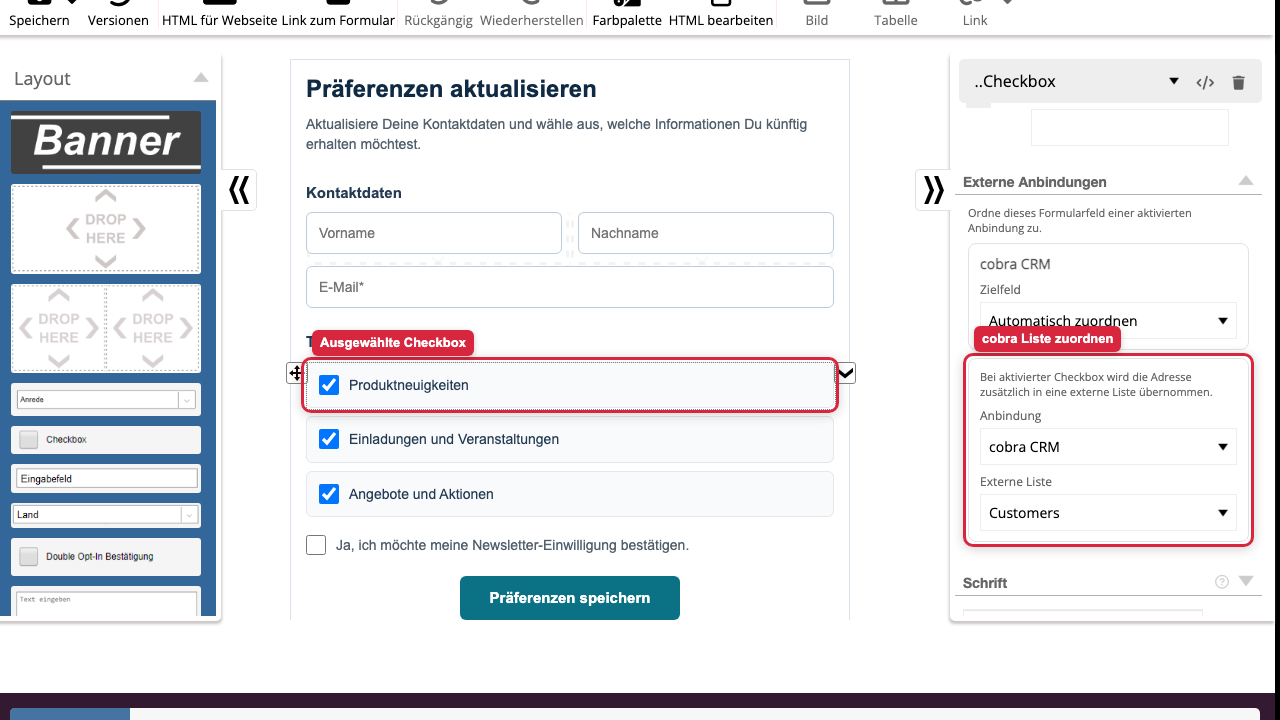
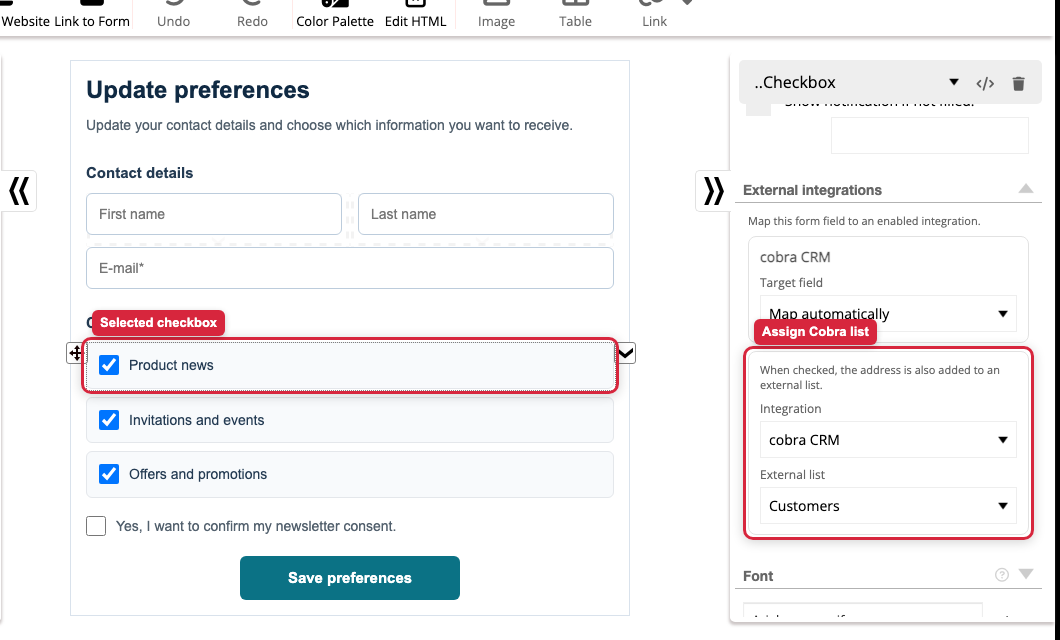
If a visitor checks this box, the found or newly created cobra person will also be added to the selected cobra list. This allows you to directly map interests from a form as a list membership in cobra.
The double opt-in checkbox is excluded. It only controls consent and the time of transfer, not the assignment to a cobra list.
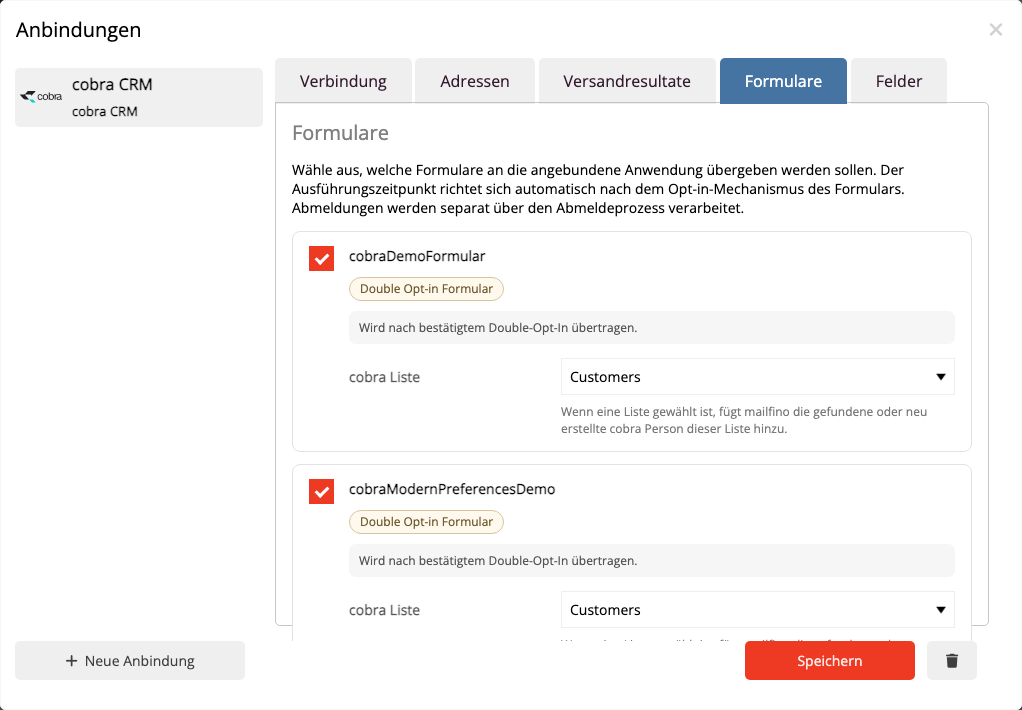
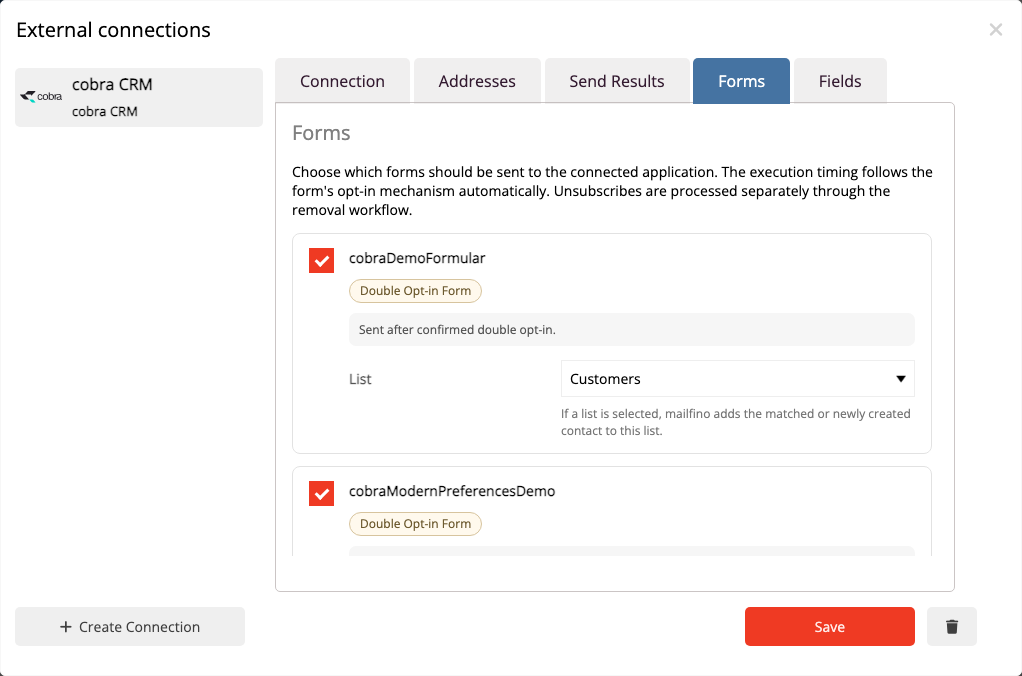
5. Check configuration in the connection manager
After saving, you can change the setting in the area Connections Check. Open the cobra connection and switch to the area Forms. There you can see which forms are connected to cobra and whether a standard list has been selected for form submissions.
If you also select a cobra list there, mailfino will add every submitted address to this list. This is a general form list. The list actions on individual checkboxes can also populate additional cobra lists.