Bilder fügst Du über Bild in der oberen Werkzeugleiste oder als fertigen Bildbaustein aus der Elementleiste ein. Dateien für Empfänger lädst Du separat über Anhang hoch. Wähle danach immer das konkrete Bild oder den konkreten Link aus, damit der Style Editor die passenden Eigenschaften zeigt.
Bild und Anhang in der Newsletter-Werkzeugleiste
Bildquelle wählen und Bild einfügen {#media-insert-image}
Setze den Cursor an die gewünschte Position und wähle oben Bild, oder ziehe
einen Bildbaustein aus Layout in den Newsletter.
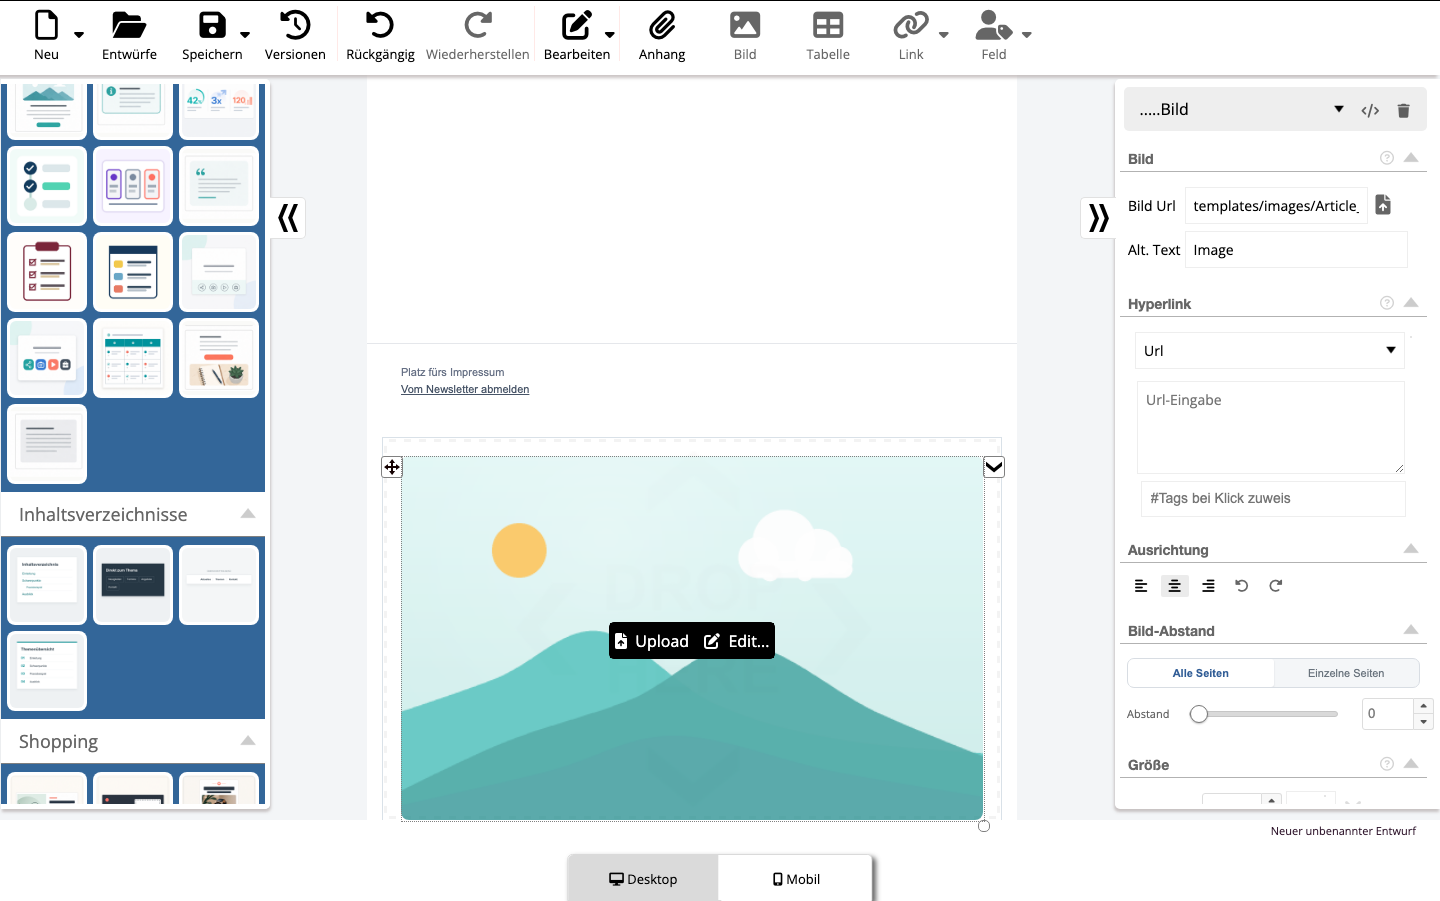
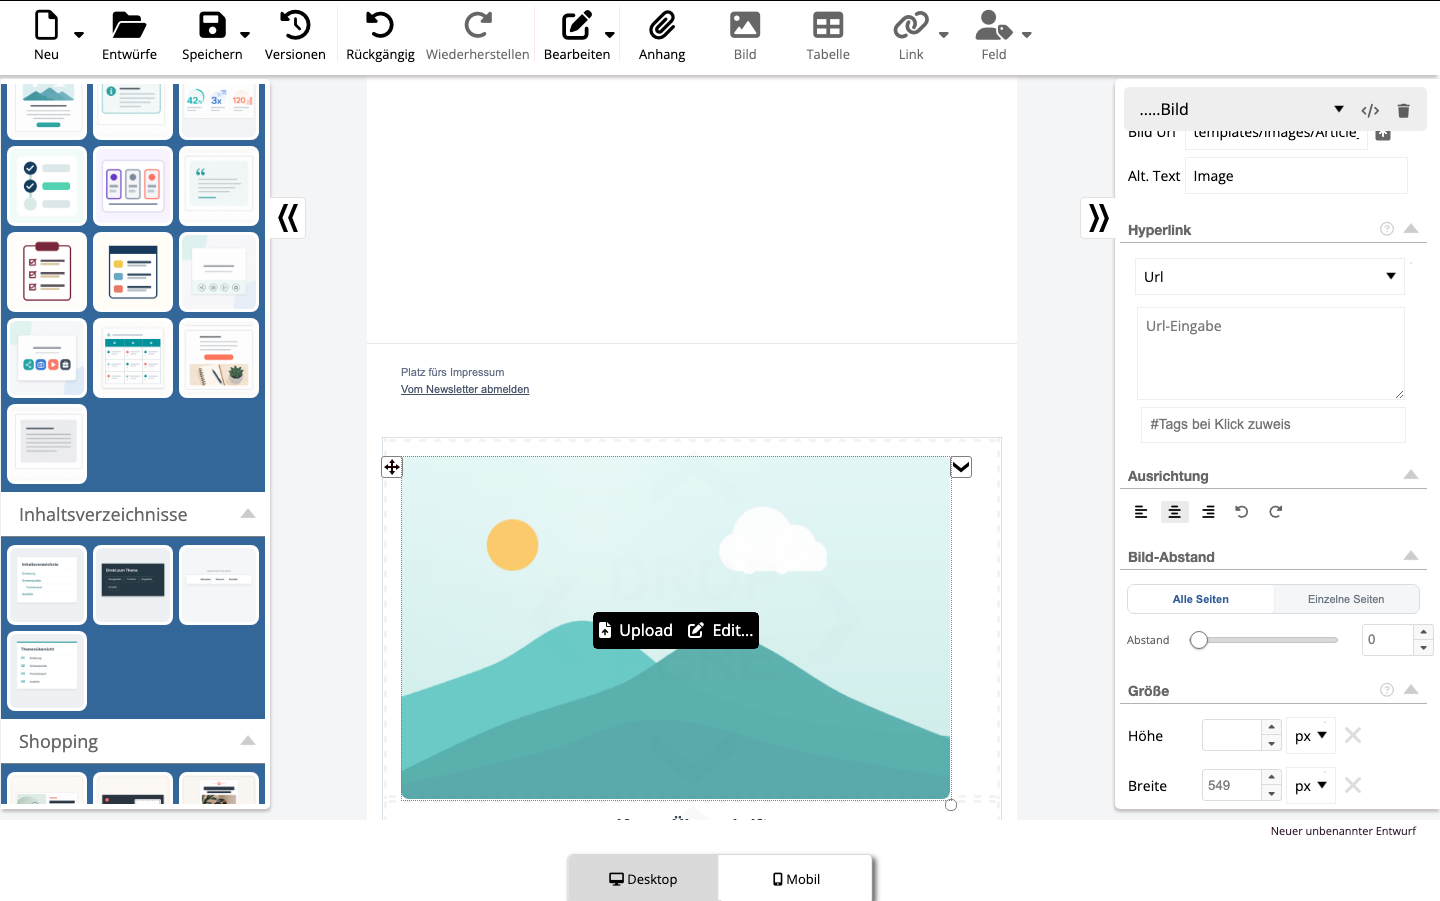
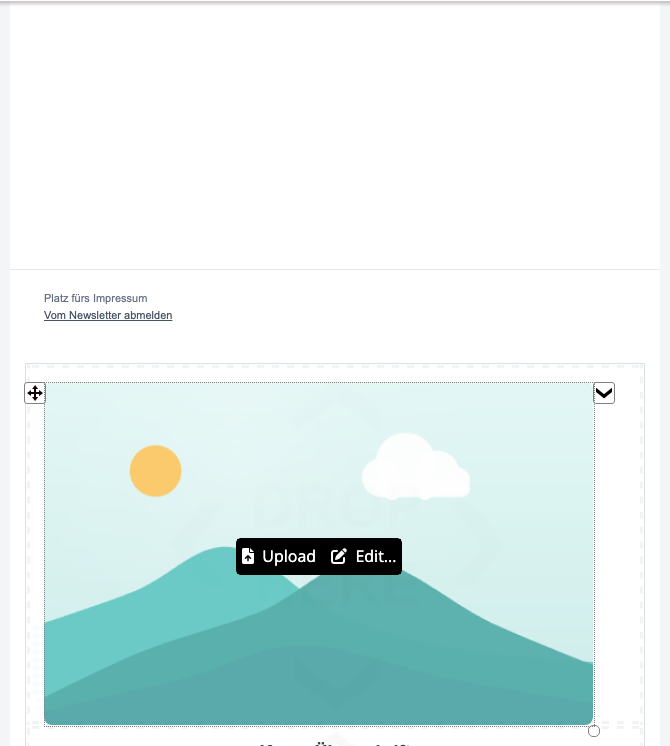
Wähle das eingefügte Bild aus. Oberhalb des Bildes erscheinen Upload or
Edit…. Ist die KI-Bildfunktion für Dein Konto freigeschaltet, kommt KI hinzu.
Select Upload, um eine Datei über den Dateidialog Deines Geräts hochzuladen.
Nach dem Upload öffnet sich die Bildbearbeitung. Mit Übernehmen setzt Du das neue Bild ein.
Ausgewähltes Bild mit Upload und Edit
Der allgemeine Uploadpfad besitzt aktuell keine zentrale Mediathek, in der alle früher hochgeladenen Dateien erneut ausgewählt werden können. Ein bekanntes, dauerhaft erreichbares Bild kannst Du über Bild Url wiederverwenden. Das optional freigeschaltete KI öffnet die getrennte Auswahl für KI-Bilder; es ist kein Ersatz für eine allgemeine Dateimediathek. Verwende nur Bilder, für die Du die erforderlichen Rechte besitzt.
Bild hochladen oder ersetzen {#media-upload-replace}
Wenn ein Bild markiert ist, ersetzt Upload genau dieses Bild. Ohne ausgewähltes Bild fügt der Editor die Datei an der aktuellen Einfügeposition ein. Prüfe nach dem Ersetzen Ausschnitt, Größe, Alt. Text or Hyperlink erneut; diese Eigenschaften gehören zum gewählten Bild im Entwurf.
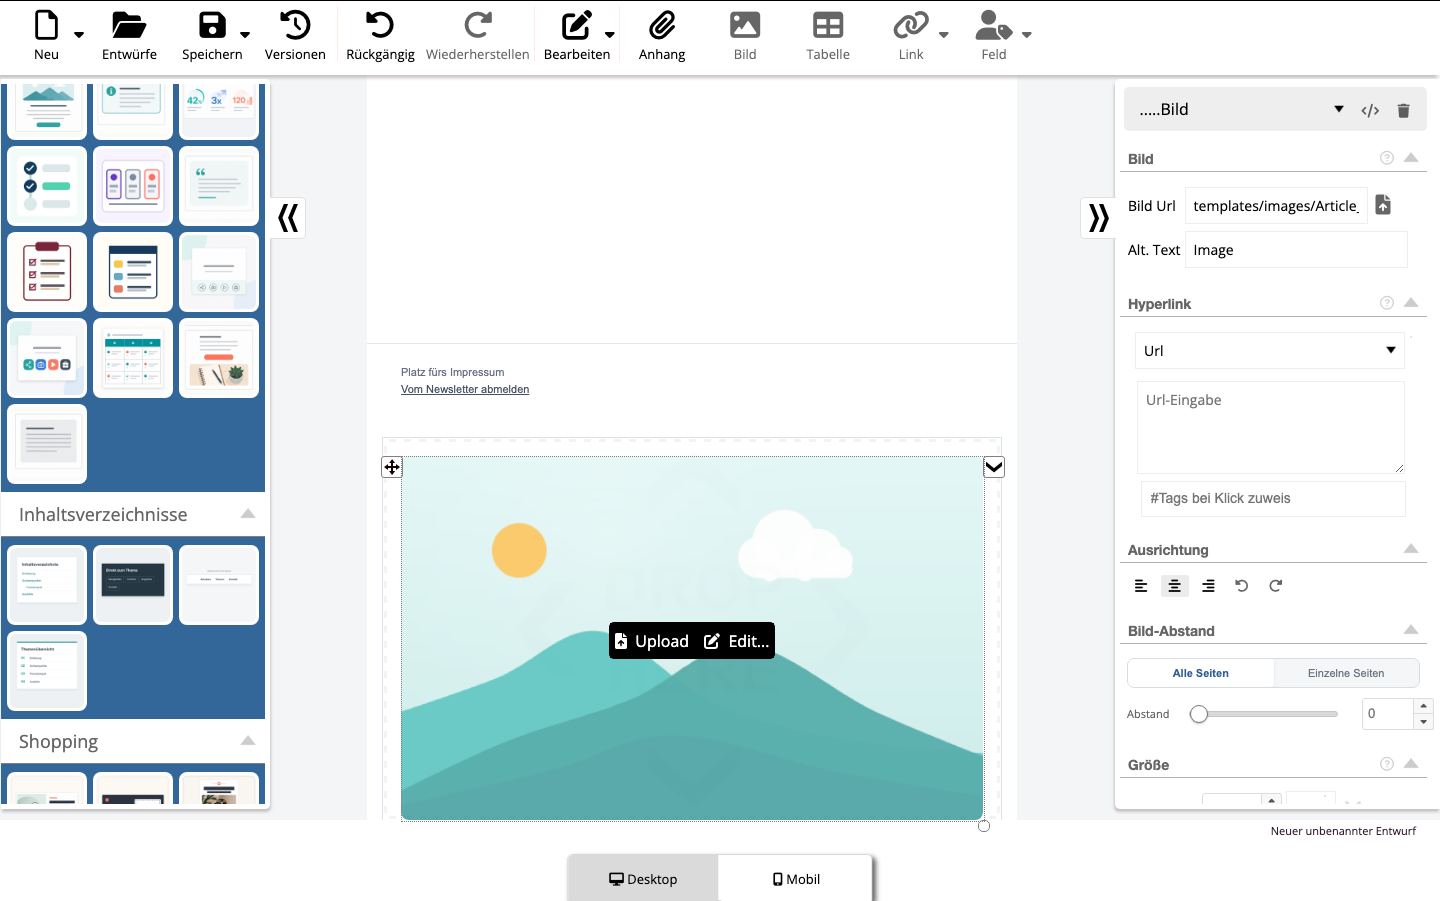
Under Bild zeigt der Style Editor die Felder Bild Url or Alt. Text. Der Upload-Button neben Bild Url führt ebenfalls in denselben Dateidialog. Eine externe https://-Adresse kann als Bild Url dienen, doch das Bild kann sich später ändern oder ausfallen. Ein Upload in den eigenen mailfino-Bildbereich schützt vor solchen Änderungen an einer fremden Quelle. Auch dieses Bild wird beim Öffnen der E-Mail nachgeladen und kann vom Mailprogramm blockiert werden.
Bild Url, Alt. Text und Upload im Style Editor
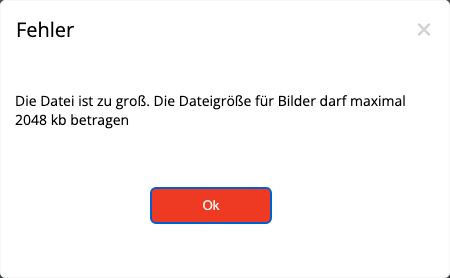
Der Server akzeptiert nur geprüfte Bildinhalte und höchstens 2.048 kB pro Upload. Stimmen Inhalt, Dateityp oder deklarierte Dateiinformationen nicht überein oder ist die Datei zu groß, erscheint eine Fehlermeldung und der Editor übernimmt die Datei nicht. Verkleinere oder exportiere sie in ein übliches Bildformat und starte einen neuen Upload.
Zuschneiden, verschieben, zoomen und drehen {#media-crop}
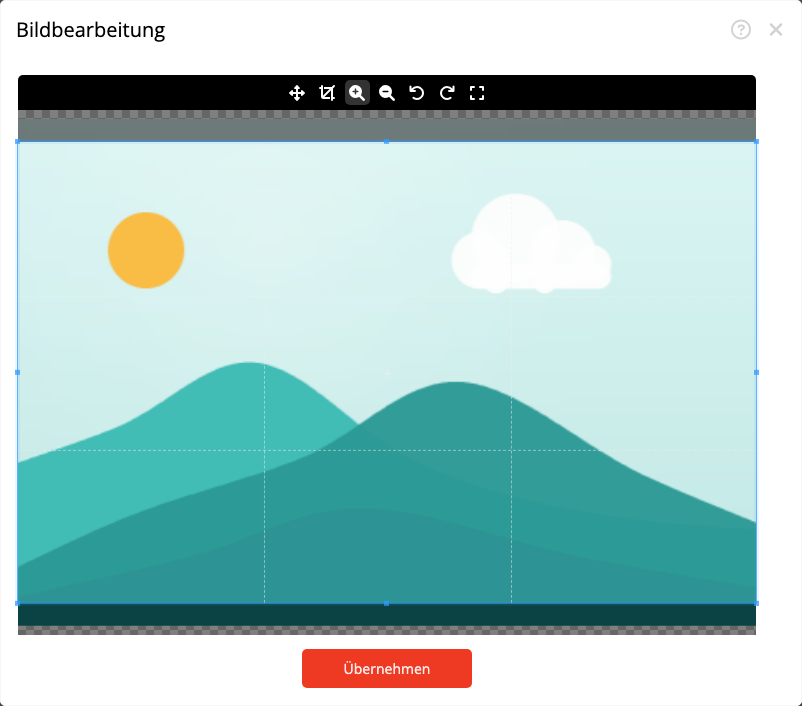
Wähle am markierten Bild Edit…. In der Bildbearbeitung stehen von links nach rechts Verschieben, Zuschneiden, Vergrößern, Verkleinern, Linksdrehung, Rechtsdrehung und Zurücksetzen zur Verfügung. Der Zuschneider übernimmt das Seitenverhältnis des sichtbaren Bildplatzes, damit das Ersatzbild in den bestehenden Newsletterabschnitt passt.
Bildbearbeitung mit Zuschnitt, Zoom, Drehung und Übernehmen
Verschiebe Bild und Rahmen so, dass das wichtige Motiv vollständig sichtbar bleibt. Übernehmen erzeugt das bearbeitete Bild und setzt es in den Entwurf ein. Das Zurücksetzen-Symbol verwirft die Bearbeitung im Dialog; schließe den Dialog ohne Übernehmen, wenn das Newsletterbild unverändert bleiben soll. Ein später erneut geöffneter Ausschnitt kann weiter angepasst werden.
Bild auf der Arbeitsfläche skalieren {#media-scale}
Wähle das Bild und ziehe am Größenanfasser des Auswahlrahmens. Der Editor begrenzt die Breite auf den umgebenden Container und behält beim normalen Ziehen das Seitenverhältnis bei. Im Style Editor kannst Du die wirksame Breite und Höhe unter Größe prüfen; für ein normales Foto sollte die Höhe automatisch aus der Breite entstehen.
Bild mit Größenanfasser und Größenwerten
Prüfe die Skalierung zusätzlich unter Mobile. Bei einem Bild mit fester Desktopbreite legt der Editor dort eine prozentuale mobile Breite an. Vergrößere ein kleines Ausgangsbild nicht stark, da es sonst unscharf wird, und verlasse Dich bei Text oder Preisen nie auf die Auflösung eines Bildes.
Trage den Alternativtext am ausgewählten Bild unter Alt. Text ein. Beschreibe knapp Inhalt oder Zweck, zum Beispiel „Zwei Personen im Gespräch an einem Workshop-Tisch“. Wiederhole keine direkt danebenstehende Überschrift und beginne nicht mit „Bild von“.
Informativ: Beschreibe die Information, die ohne das Bild fehlen würde.
Verlinkt: Nenne Inhalt oder Ziel so, dass der Link auch ohne sichtbares Bild
verständlich bleibt.
Dekorativ: Lasse Alt. Text leer, wenn Linie, Muster oder Stimmung keinerlei
zusätzliche Information vermitteln.
Text, Preise, Fristen und die einzige Handlungsaufforderung dürfen nicht nur im Bild stehen. Prüfe den Alternativtext in der Vorschau und im Barrierefreiheitscheck.
Bild verlinken {#media-image-link}
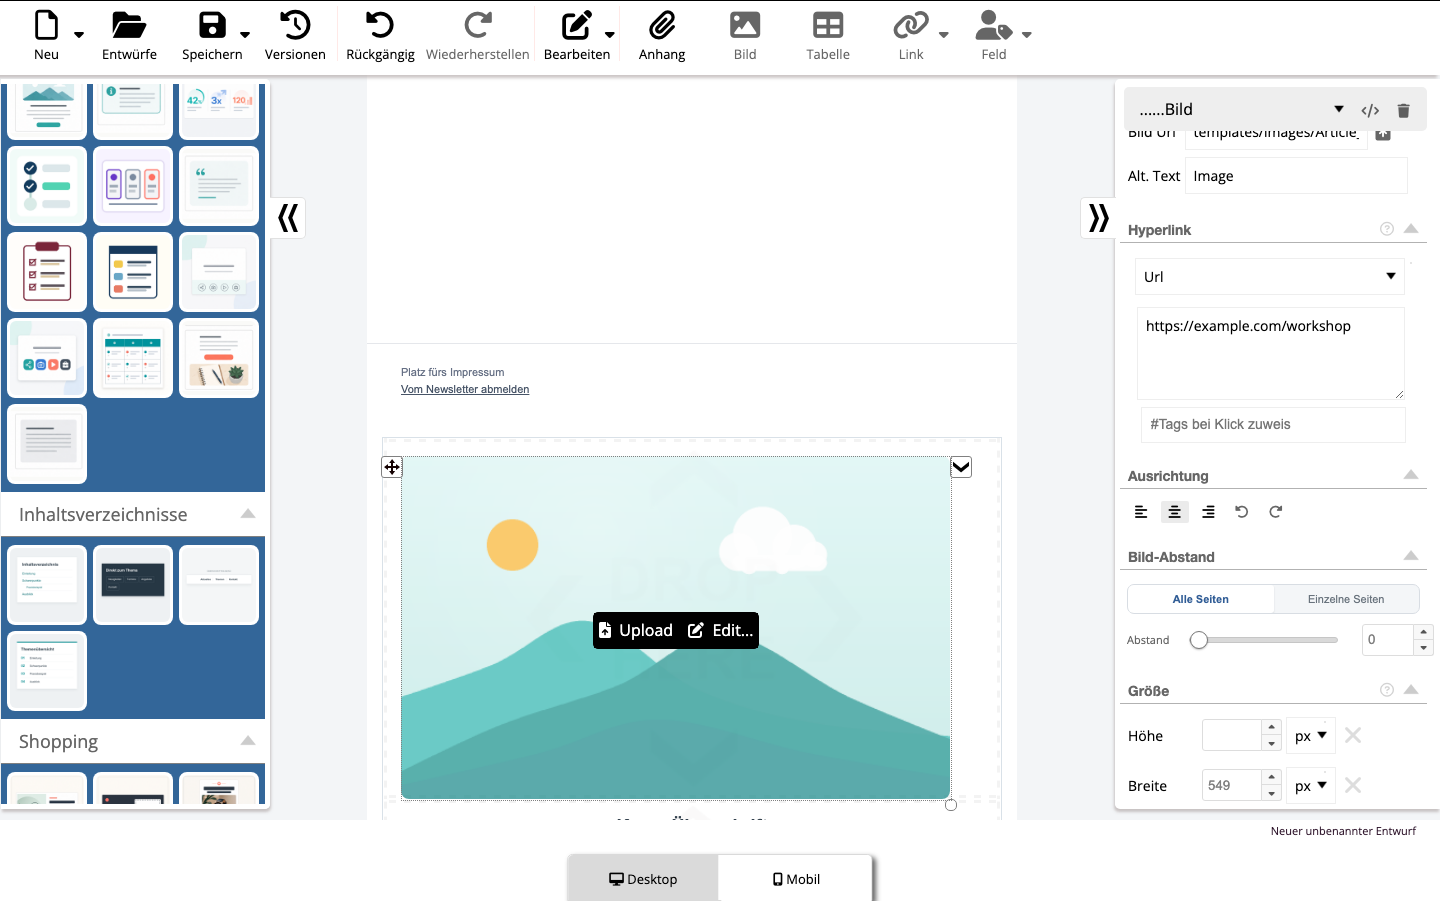
Wähle das Bild. Im Style Editor öffnet Hyperlink die Linkeigenschaften. Wähle für eine normale Zielseite Url und trage eine vollständige https://-Adresse ein. Ein vorhandener Link erscheint als umgebender Link des Bildes. Kontrolliere Bild und Ziel nach jeder Änderung erneut.
Bild mit Hyperlink und Url-Ziel
Der Alternativtext soll den Zweck des verlinkten Bildes verständlich machen. Öffne das Ziel in einer echten Testmail; der Bearbeitungsmodus selbst ist kein Linktest. Weitere Linkarten stehen unter links and personalization.
Anhänge hochladen und verwalten {#media-attachments}
Wähle oben Anhang und danach genau eine Datei im Dateidialog.
Nach erfolgreicher Prüfung erscheint sie im Bereich Anhänge am Ende des
Newsletters mit Dateisymbol und Anzeigename. Eine Größe wird nur bei älteren Einträgen angezeigt, die diesen Wert noch enthalten.
Öffne am Anhang das Kontextmenü und wähle Anhang löschen, wenn die Datei nicht
mehr als Download angeboten werden soll. Nach dem letzten Eintrag entfernt der Editor den ganzen Anhangsbereich.
Anhangsliste am Ende des Newsletters
Die Uploadprüfung erlaubt nur freigegebene Dateitypen, kontrolliert Typ und Inhalt und lehnt leere, zu große oder verdächtige Dateien ab. Die Obergrenze des aktuellen Uploads beträgt auch für Anhänge 2.048 kB. Bei einer Sicherheitsmeldung wurde die Datei nicht übernommen. Behebe Ursache oder Dateiformat, statt die Warnung zu umgehen.
mailfino hängt diese Dateien nicht als MIME-Anhang an die E-Mail an. Der Bereich Anhänge und die Linkart Dateianhang führen zu einem öffentlichen Downloadlink im Newsletter. Die Datei muss deshalb nach dem Versand dauerhaft erreichbar bleiben. Entferne oder ersetze sie nicht, solange versendete Newsletter noch darauf verweisen.
Auf einen Anhang verlinken {#media-attachment-link}
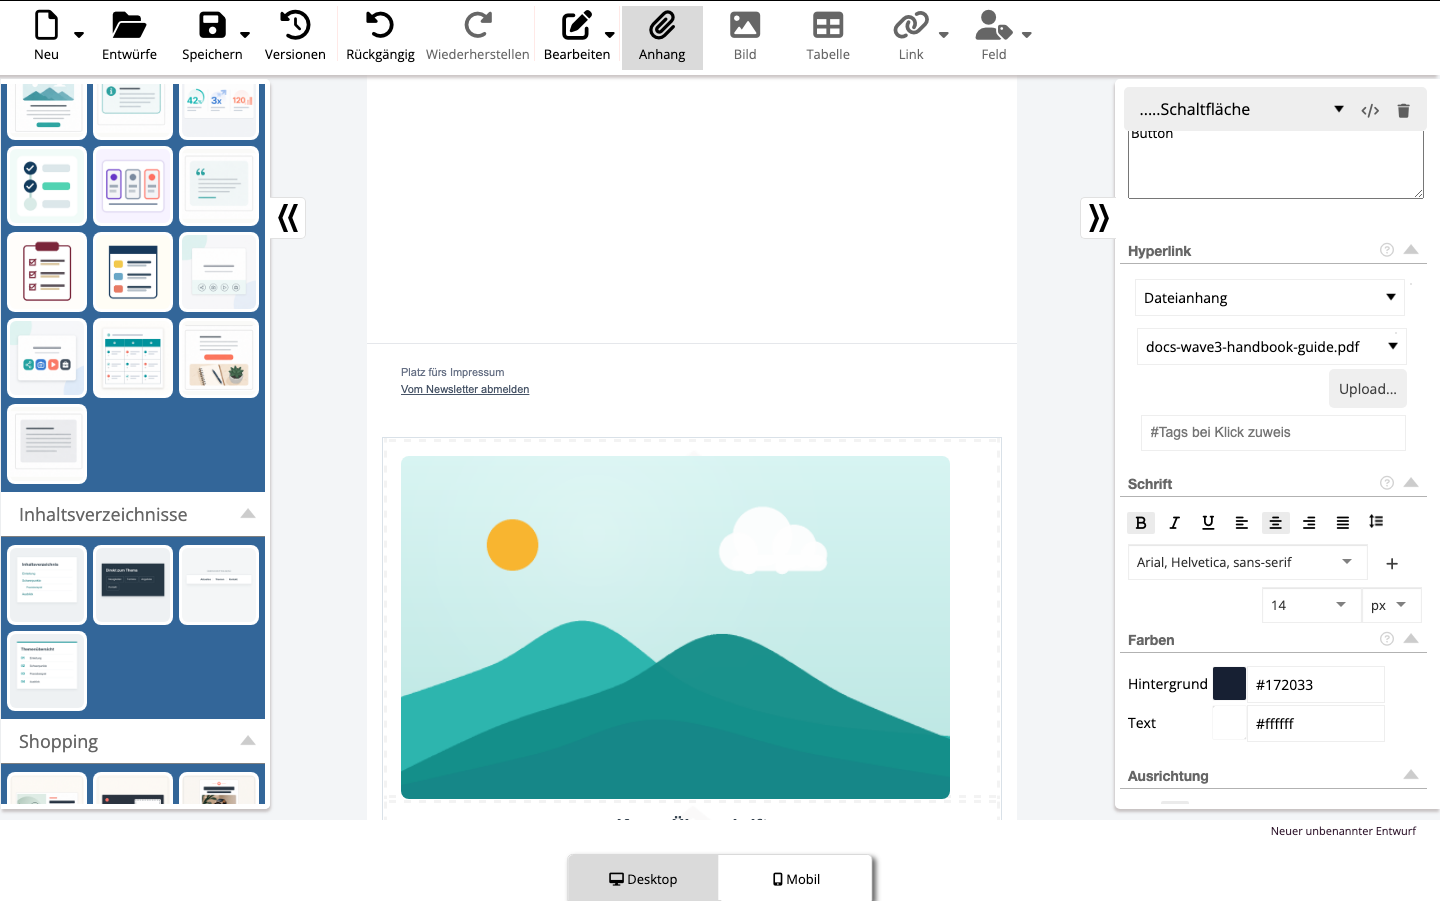
Wähle den Text, das Bild oder den Button, der auf die Datei führen soll. Öffne Hyperlink, stelle die Linkart auf Dateianhang und wähle die bereits hochgeladene Datei unter Dateiauswahl. Dort kannst Du bei Bedarf auch einen neuen Anhang hochladen. Formuliere das Ziel eindeutig, etwa „Herbstprogramm als PDF herunterladen“.
Dateianhang als Ziel eines Hyperlinks
Entfernst Du die Datei später aus Anhänge, prüfe alle Buttons, Bilder und Texte, die darauf verwiesen haben. Ein verständlicher Linktext ersetzt nicht die Kontrolle, ob das Ziel noch vorhanden ist.
Fehler beheben {#media-errors}
Abgelehnter Bild- oder Anhangsupload
Meldung oder Zustand
Lösung
Datei zu groß
Bild komprimieren oder Anhang über eine Downloadseite bereitstellen; anschließend neu auswählen.
Dateiformat nicht erlaubt
In ein freigegebenes Format exportieren; eine umbenannte Dateiendung genügt nicht.
Dateiinhalt ungültig
Datei in der Quellanwendung neu erzeugen und prüfen, statt die fehlerhafte Datei erneut zu senden.
Upload fehlt oder bricht ab
Verbindung und Sitzung prüfen, Datei erneut auswählen und das erfolgreiche Ergebnis im Newsletter kontrollieren.
Sicherheitsprüfung fehlgeschlagen
Datei nicht verwenden; sichere Quelle und bereinigte Datei beschaffen.
Vor dem Versand prüfen
Hat jedes informative oder verlinkte Bild einen konkreten Alt. Text?
Sind Ausschnitt, Drehung und Größe auf Desktop und Mobil korrekt?
Funktioniert jeder Bildlink in einer Testmail?
Sind alle Anhänge beabsichtigt, eindeutig benannt und unter Dateianhang noch
auswählbar?
Ist kein wichtiger Inhalt ausschließlich als Bild oder Anhang verfügbar?
Insert images through Image in the top toolbar or as a ready-made image block from the block panel. Upload files for recipients separately through Attach File. Afterwards, select the exact image or link so the Style Editor displays its relevant properties.
Image and Attach File in the Newsletter Editor toolbar
Choose an image source and insert an image {#media-insert-image}
Place the cursor at the intended position and select Image at the top, or
drag an image block from Layout into the newsletter.
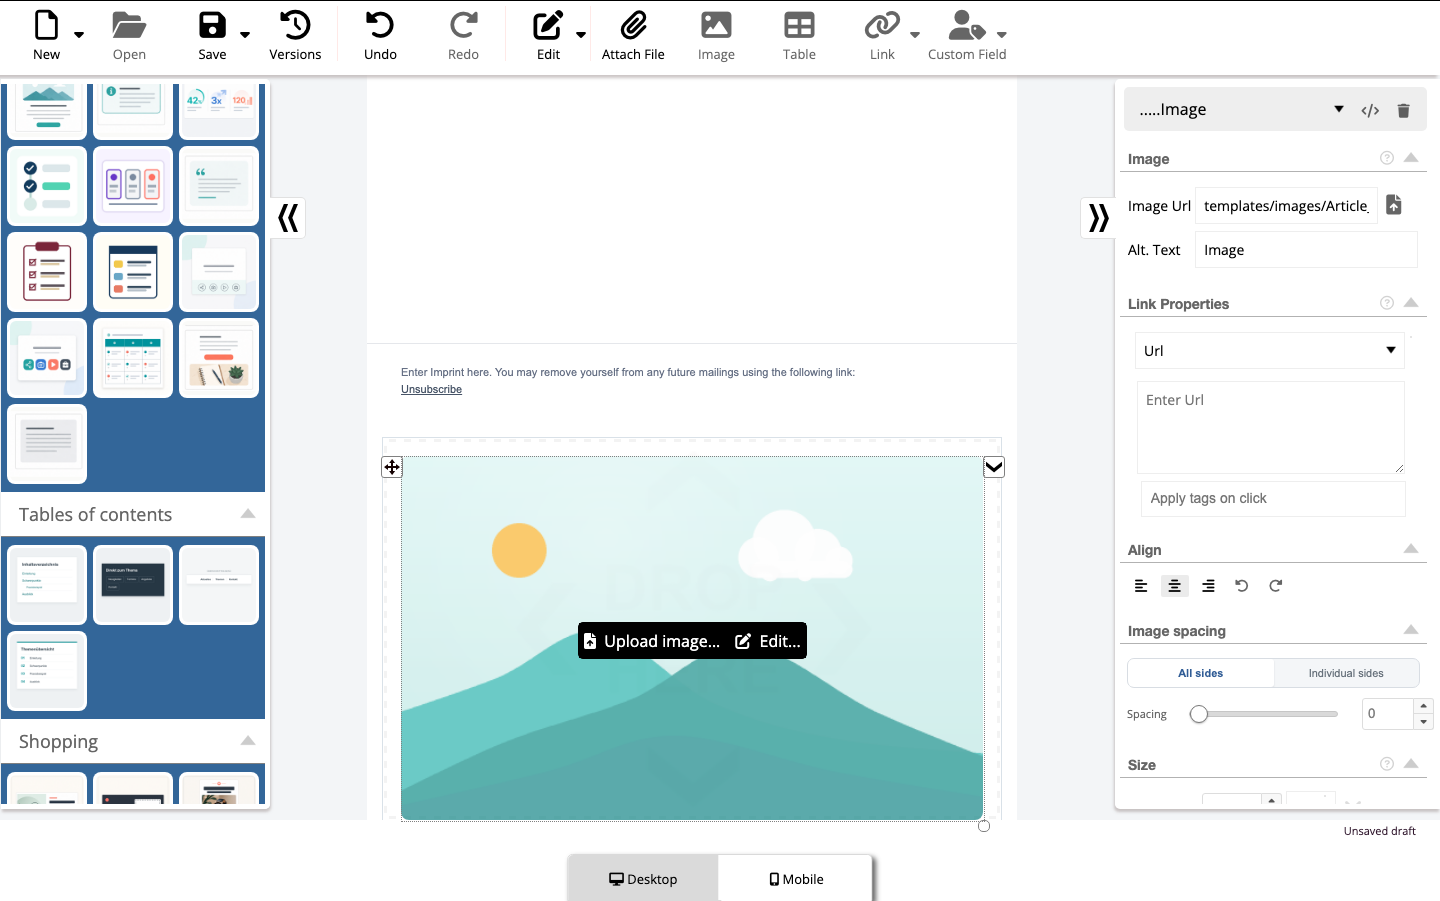
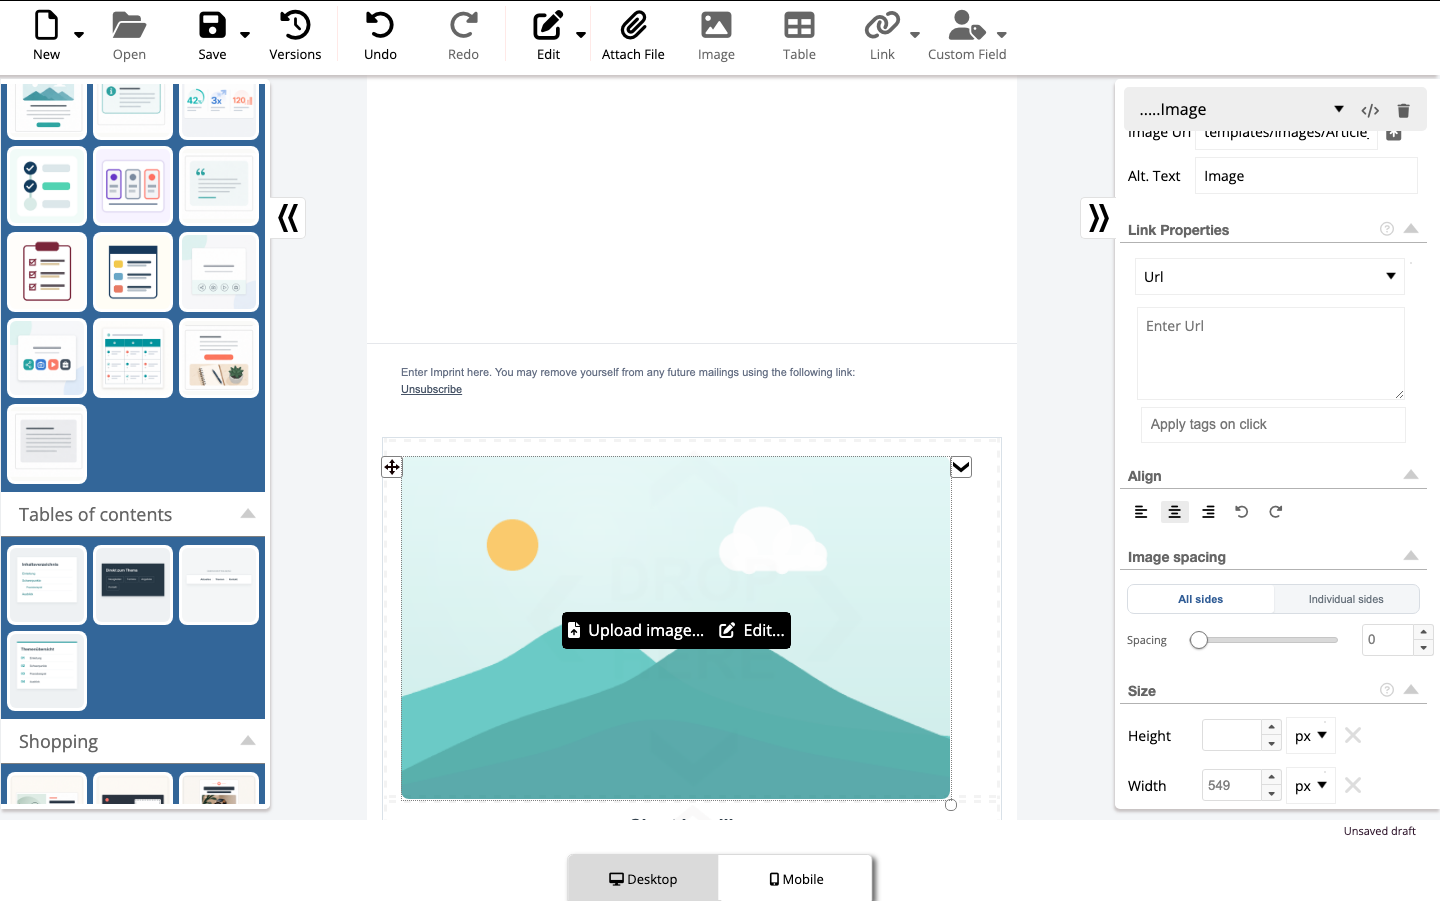
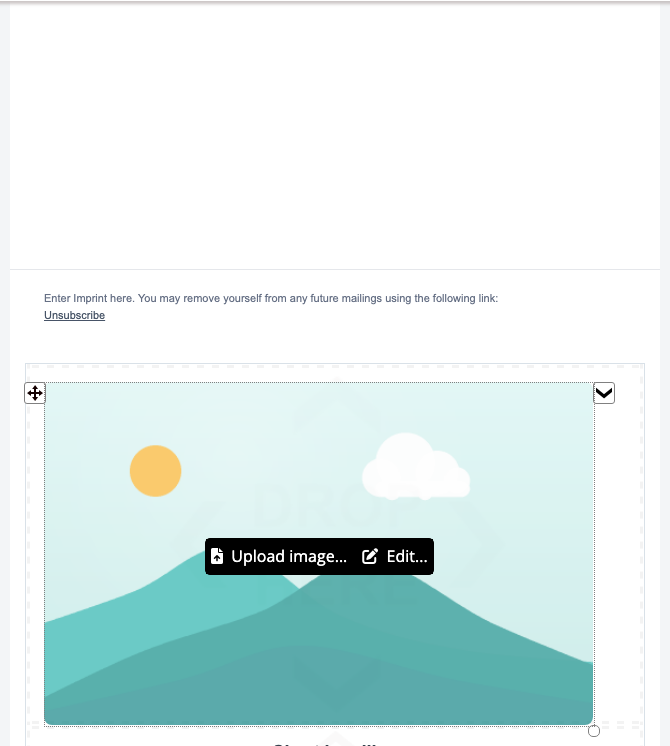
Select the inserted image. Upload image… and Edit… appear above it.
If AI image features are enabled for your account, AI… appears as well.
Select Upload image… to choose a file through your device’s file picker.
After upload, the Image Editor opens. Select Apply to insert the new image.
Selected image with Upload image and Edit
The standard upload path currently has no central media library for selecting every previously uploaded file again. Reuse a known, permanently available image through Image Url. The optional AI… action opens the separate AI-image selection; it is not a general file media library. Use only images for which you have the required rights.
Upload or replace an image {#media-upload-replace}
When an image is selected, Upload image… replaces that exact image. Without a selected image, the editor inserts the file at the current insertion position. After replacement, check crop, size, Alt. Text, and Link Properties again; these properties belong to the selected image in the draft.
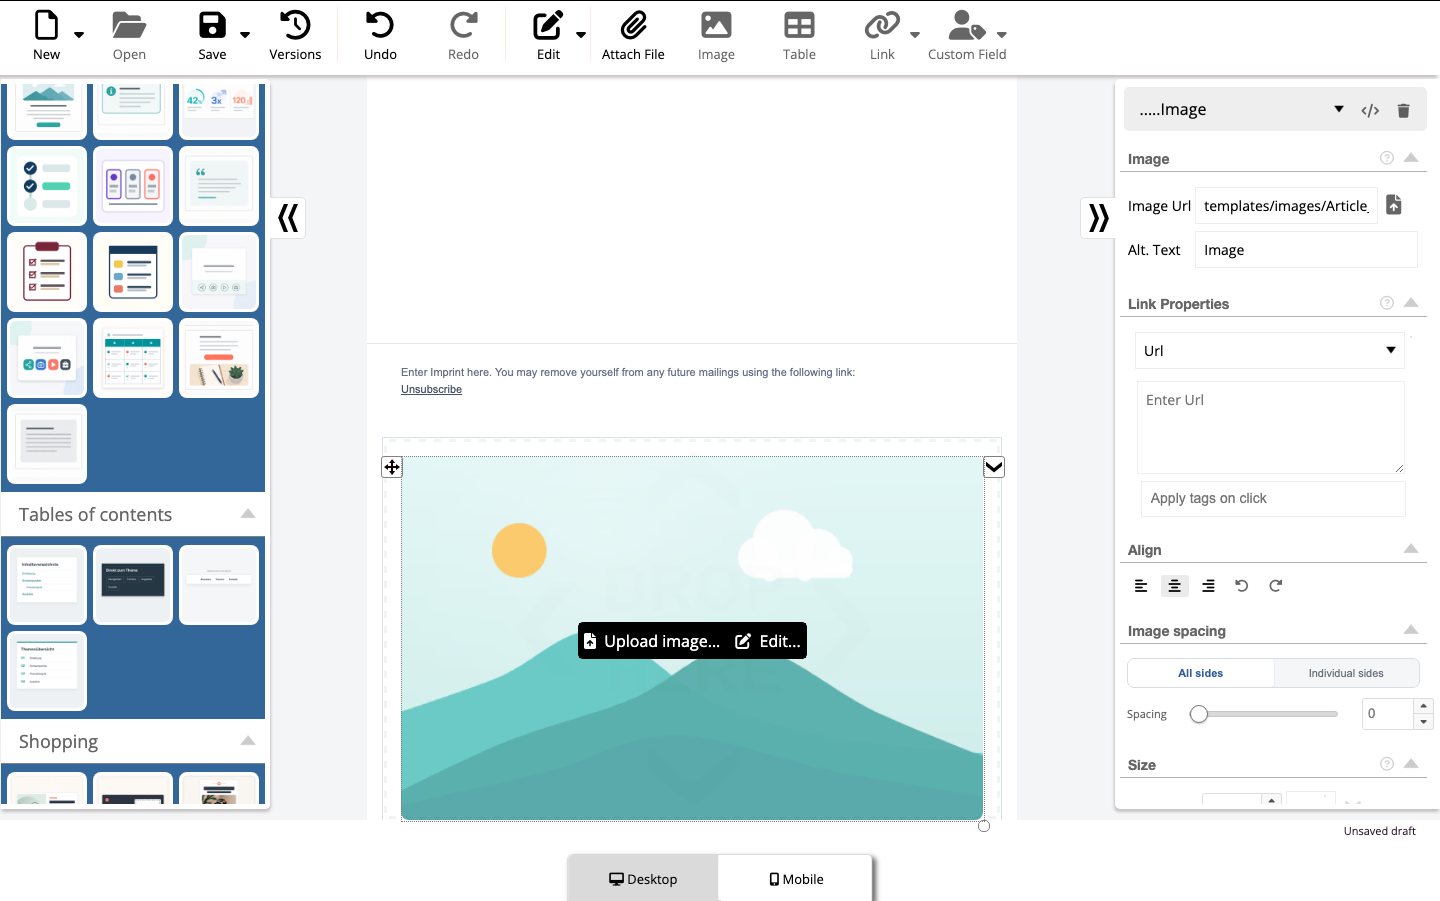
Under Image, the Style Editor displays Image Url and Alt. Text. The upload icon beside Image Url opens the same file picker. You can use an external https:// address as the Image Url, but the remote asset may change or disappear. Uploading it to your mailfino image area protects against changes at that third-party source. The image is still loaded when the email opens and may still be blocked by the email client.
Image Url, Alt. Text, and upload in the Style Editor
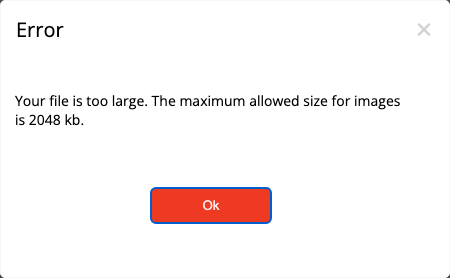
The server accepts only verified image content and no more than 2,048 kB per upload. If content, file type, or declared file information do not match, or the file is too large, the editor shows an error and does not use it. Resize or export the file in a common image format, then start a new upload.
Crop, move, zoom, and rotate {#media-crop}
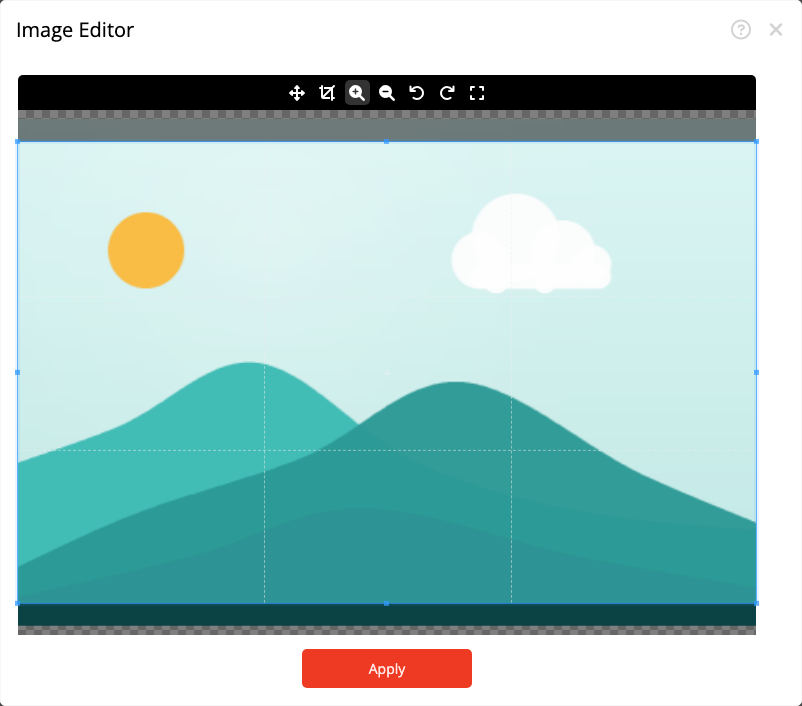
Select Edit… above the marked image. From left to right, the Image Editor offers move, crop, zoom in, zoom out, rotate left, rotate right, and reset. Its crop frame adopts the visible image slot’s aspect ratio so the replacement continues to fit the existing newsletter section.
Image Editor with crop, zoom, rotation, and Apply
Move the image and frame until the important subject remains completely visible. Apply creates the edited image and inserts it into the draft. The reset icon restores the editing state inside the dialog; close without applying when the newsletter image should remain unchanged. Reopening an edited crop lets you adjust it again.
Scale an image on the canvas {#media-scale}
Select the image and drag the resize handle on its selection frame. The editor limits the width to the surrounding container and preserves the aspect ratio during normal dragging. Check the effective width and height under Size in the Style Editor; a normal photograph should derive its height automatically from its width.
Image with resize handle and Size values
Inspect the scale in Mobile as well. For a fixed-width desktop image, the editor adds a percentage-based mobile width there. Do not enlarge a small source image substantially because it becomes blurry, and never rely on image resolution for wording or prices.
Write meaningful alt text {#media-alt-text}
Enter alt text under Alt. Text on the selected image. Briefly describe its content or purpose, for example, “Two people talking at a workshop table.” Do not repeat an adjacent heading or start with “Image of”.
Informative: describe the information that would otherwise be missing.
Linked: name the content or destination so the link makes sense without a
visible image.
Decorative: leave Alt. Text empty when a line, pattern, or mood image adds
no information.
Wording, prices, deadlines, and the only call to action must not exist only in an image. Check alt text in Preview and the accessibility check.
Link an image {#media-image-link}
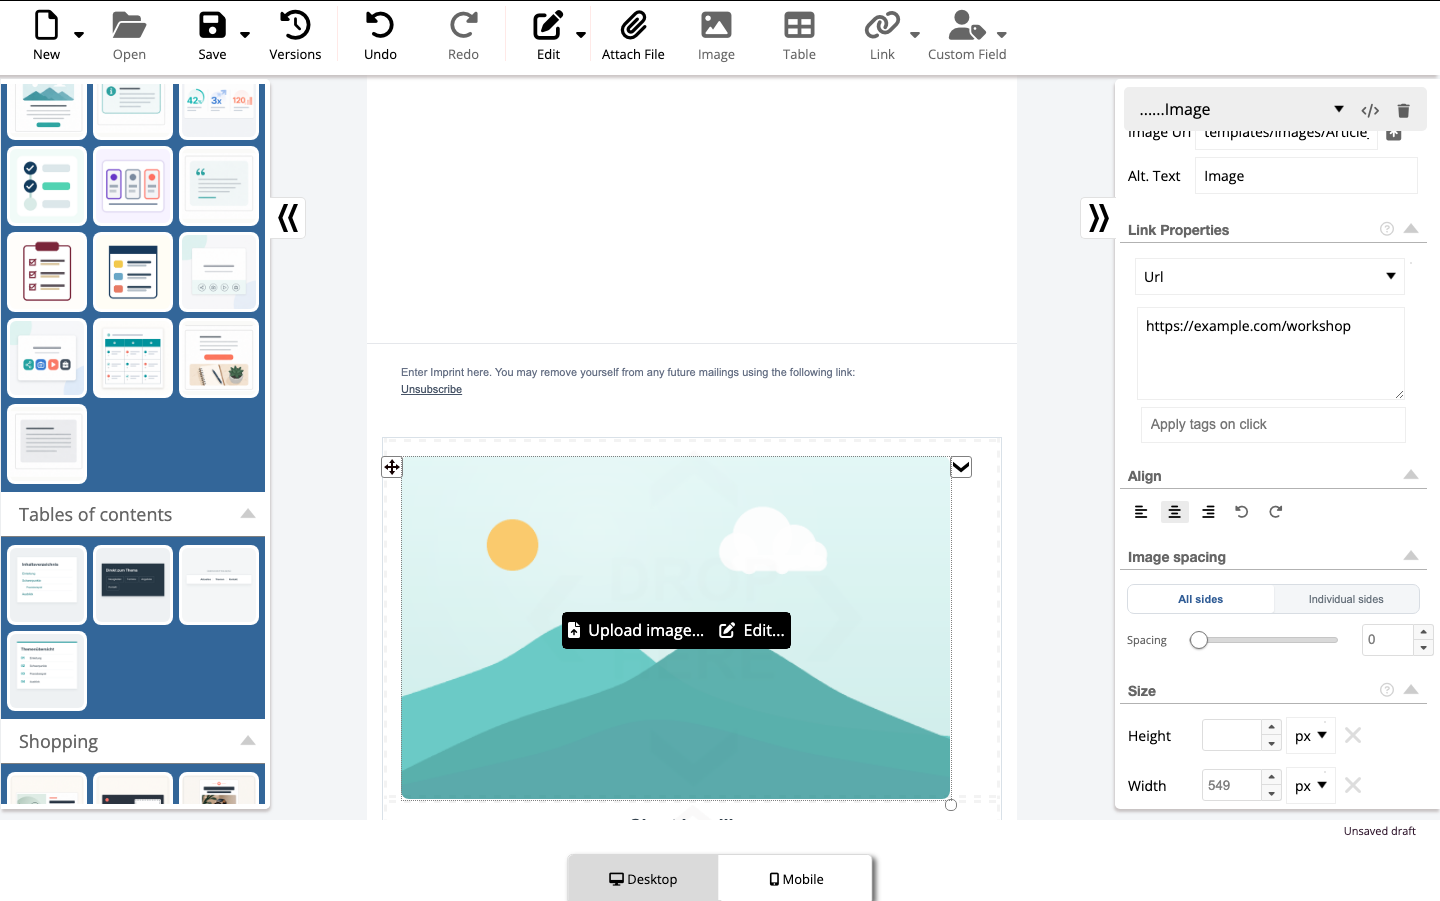
Select the image. In the Style Editor, Link Properties opens its link settings. For a regular destination, select Url and enter a complete https:// address. An existing image link appears as the link wrapped around the image; inspect it again after every image or destination change.
Image with Link Properties and a Url destination
Alt text should make the purpose of the linked image understandable. Open the destination from a real test email; editing mode is not a link test. Other link types are covered in Links and personalization.
Upload and manage attachments {#media-attachments}
Select Attach File at the top, then choose exactly one file in the file picker.
After successful validation, it appears in Attachments at the end of the
newsletter with its file icon and display name. A size is shown only for older entries that still contain that optional value.
Open the attachment’s context menu and select Remove Attachment when it
should no longer be offered as a download. After the final entry is removed, the editor removes the whole attachment area.
Attachments list at the end of the newsletter
Upload validation accepts only allowlisted file types, checks type and content, and rejects empty, oversized, or suspicious files. The current upload limit is also 2,048 kB for attachments. A security message means the file was not accepted. Correct the source or format rather than trying to bypass the warning.
mailfino does not add these files as MIME attachments to the email. The Attachments section and File Attachment link type create a public download link inside the newsletter. The file must therefore remain available after sending. Do not remove or replace it while sent newsletters still refer to it.
Link to an attachment {#media-attachment-link}
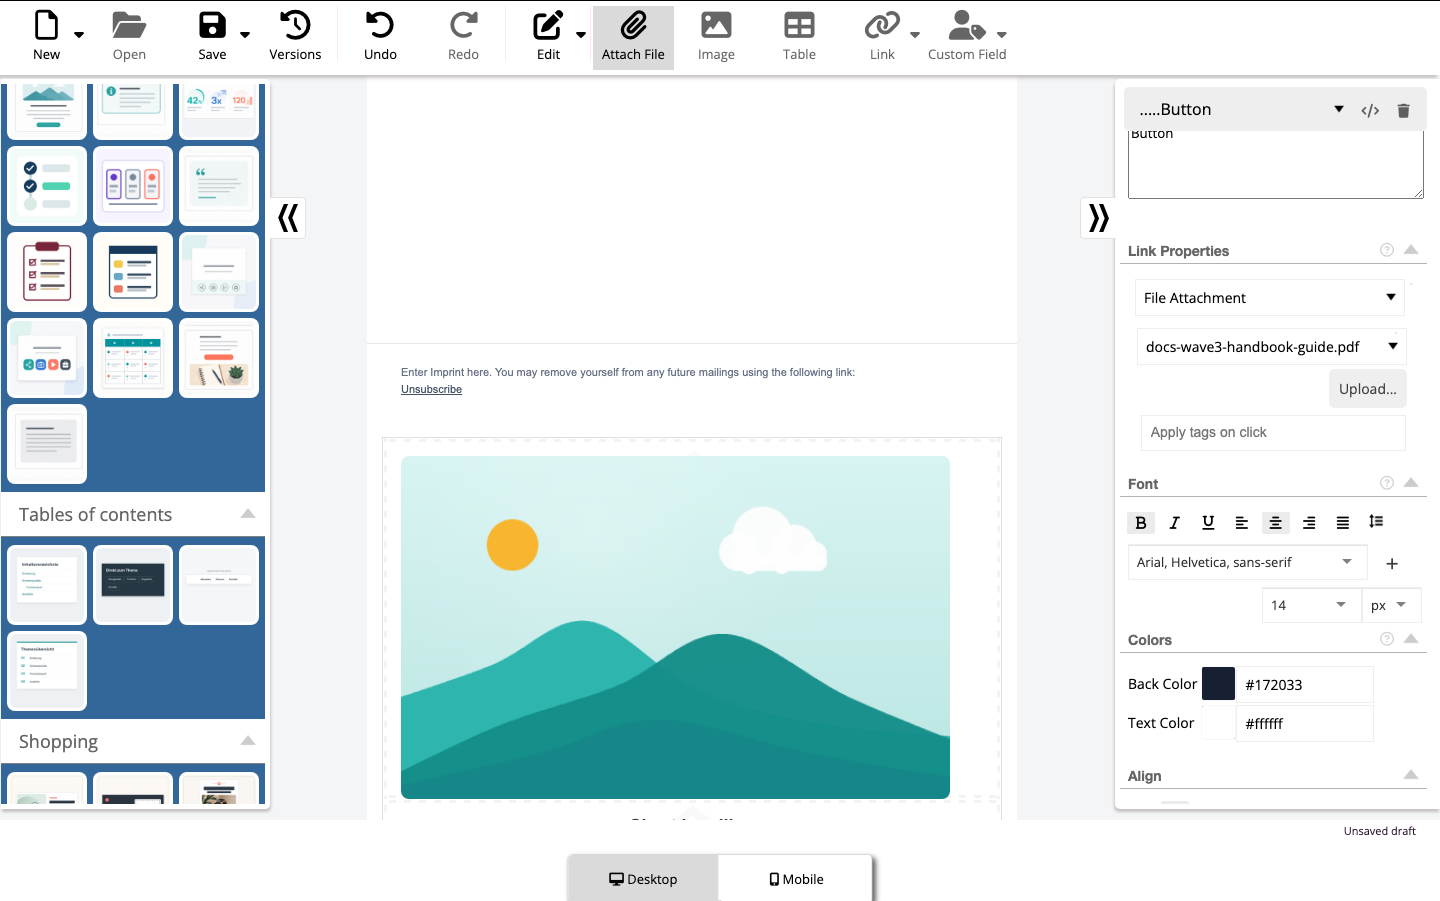
Select the copy, image, or button that should lead to the file. Open Link Properties, set the link type to File Attachment, and choose the uploaded file under Choose or upload file. You can upload another attachment from the same panel when needed. Use a descriptive label such as “Download the autumn programme as a PDF.”
File Attachment as a link destination
If you later remove the file from Attachments, inspect every button, image, and piece of copy that referred to it. A descriptive label does not replace checking that the destination still exists.
Resolve errors {#media-errors}
Rejected image or attachment upload
Message or state
Resolution
File too large
Compress the image or publish the attachment on a download page, then select it again.
File format not permitted
Export to an allowlisted format; renaming the extension is not sufficient.
Invalid file content
Recreate and inspect the file in its source application instead of resending the faulty file.
Upload missing or interrupted
Check connection and session, select the file again, and verify the successful result in the newsletter.
Security check failed
Do not use the file; obtain a clean copy from a trusted source.
Check before sending
Does every informative or linked image have specific Alt. Text?
Are crop, rotation, and size correct on Desktop and Mobile?
Does every image destination work in a test email?
Are all attachments intentional, clearly named, and still selectable under **File
Attachment**?
Is no important content available only as an image or attachment?



 Deutsch
  English