
The newsletter dispatch process at a glance
With mailfino it is easy to create and send a newsletter.
Here is a brief overview of the process of creating and sending.

There is a three-step workflow for creating and sending a newsletter:
- Create - Creation of a newsletter
- Receiver - Selection of the recipient list
- Send - Preview and dispatch of your newsletter
At the top right, instead of the logout symbol, there is a X button. This closes the editor and takes you back to the dashboard.
Creating the newsletter
The first step is the actual creation of your newsletter. There is an extensive drag & drop editor for the newsletter design in the Create tab.
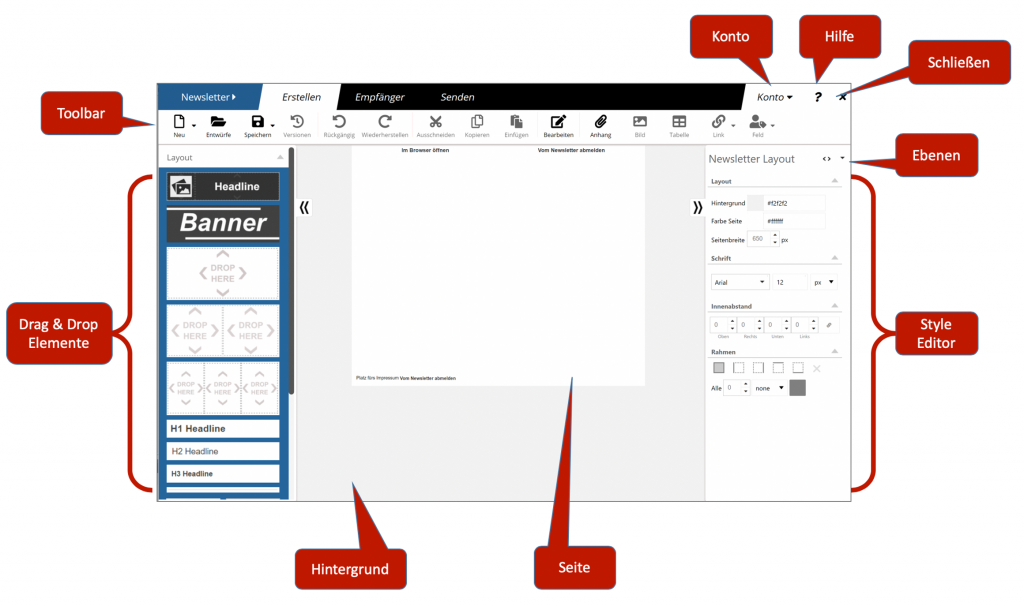
Our newsletter editor is clearly structured. On the left there is a series of elements that can be inserted into the newsletter in the middle using drag & drop. On the right, the design of the newsletter and individual elements can be customized. Above this is a toolbar.
The creation of Newsletters is explained here.
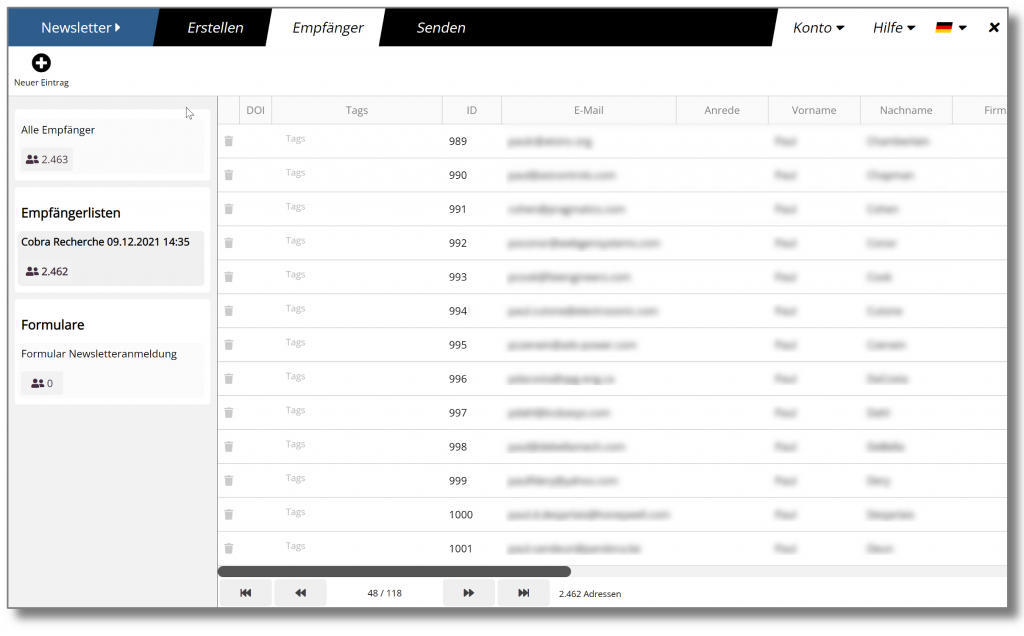
Select recipient list
In the second tab, you will see a list of all addresses to which your newsletter is to be sent. It is possible to edit or remove individual entries before sending. However, if you use cobra, these changes will not be transferred back to cobra.
Send - Preview and dispatch
In the area Send you will see a preview of your newsletter. You can also select the sender and subject, specify tracking options, send test emails and finally commission the dispatch of your newsletter.
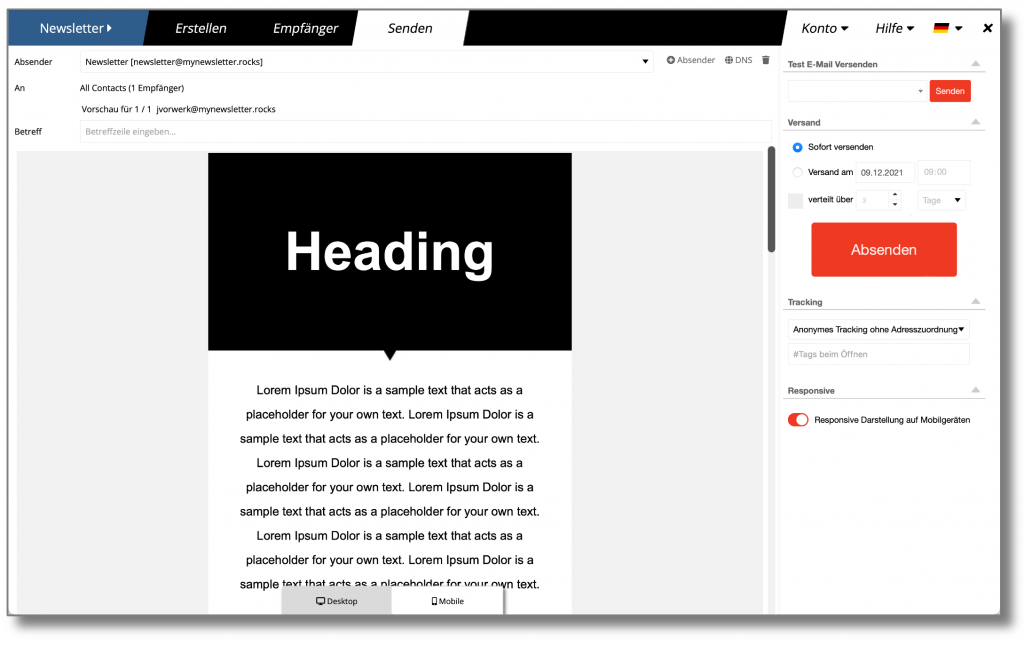
There is a preview for the display of your newsletter on desktop computers and on mobile devices. The preview is not an exact simulation, but only an approximation.
email header
Sender
Here you can select an email address to be used as the sender address. To enter a new sender address, click on the + sender button and enter the new sender address.
To
Indicates the recipient list to which the newsletter should be sent.

With the small arrow button next to the line with the preview information, you can view the preview of your newsletter for different recipients.
Note: no preview is displayed for the subject line and the alternative text.
Subject
Enter a subject here. It is not possible to send a newsletter without a subject line.
Sending options
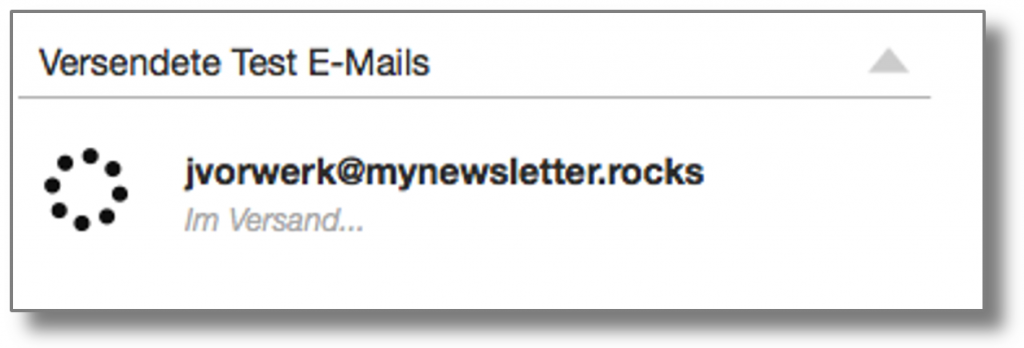
Send test email
Use this function to send your design to a single email address for test purposes. Enter the address and press Enter on the keyboard (this is important because otherwise the address will not be accepted).
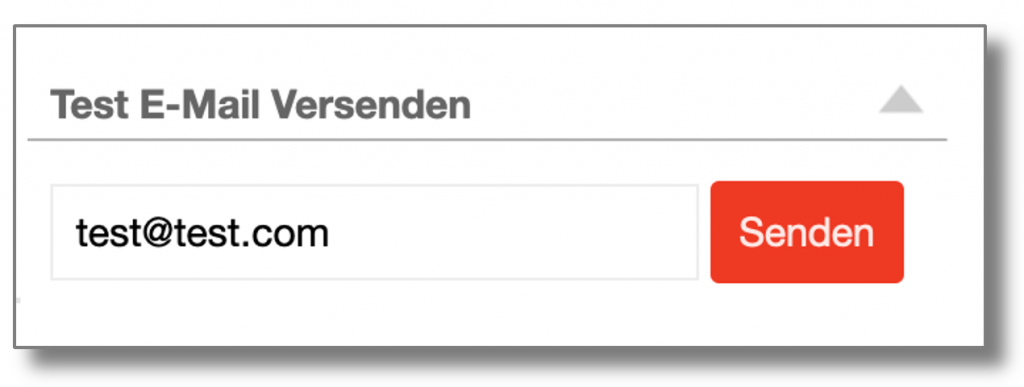
Then click on Sendto send the test email. The sending status of your test email is displayed below this section in real time:
Order
In the Order section, you determine when your newsletter should be sent.
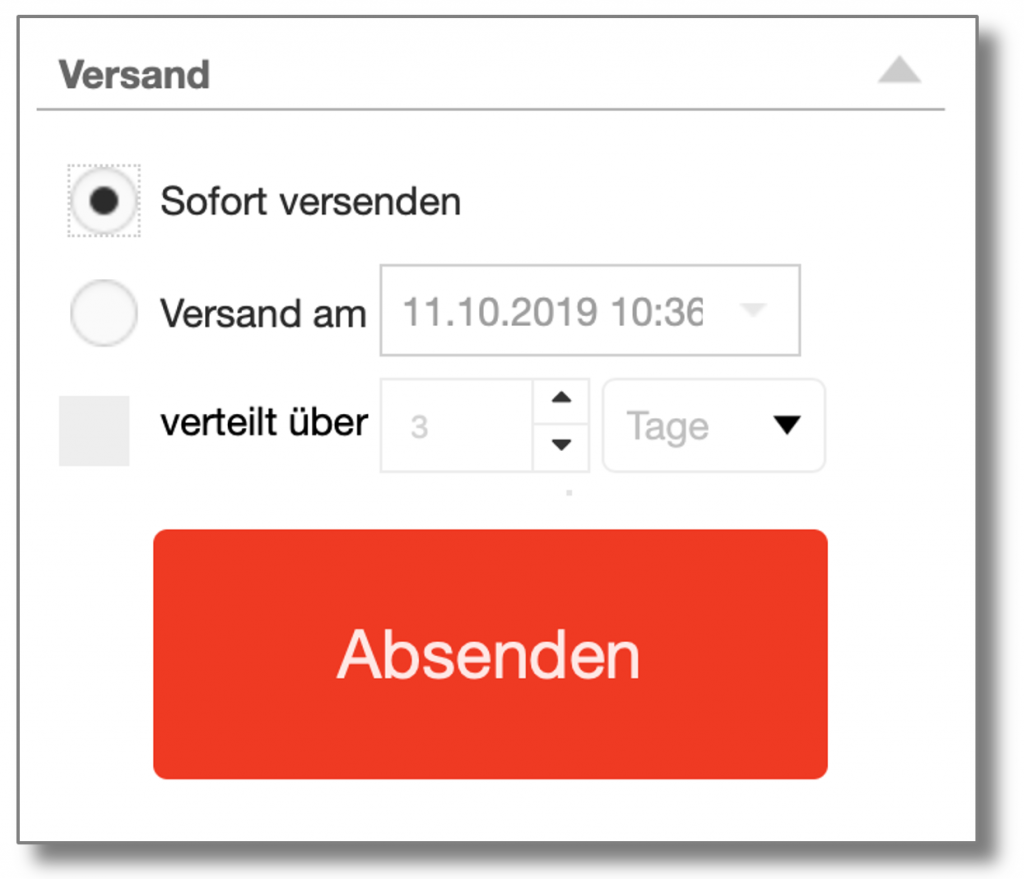
Send immediately sends your newsletter immediately after the order has been sent.
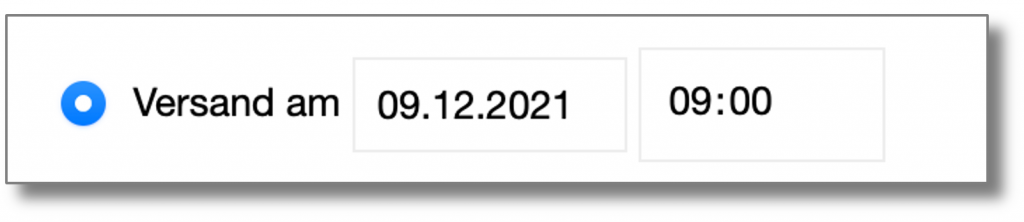
With Dispatch on you can determine an exact dispatch time for your mailing:
With the option Distributed over you can spread the dispatch over several days or hours.
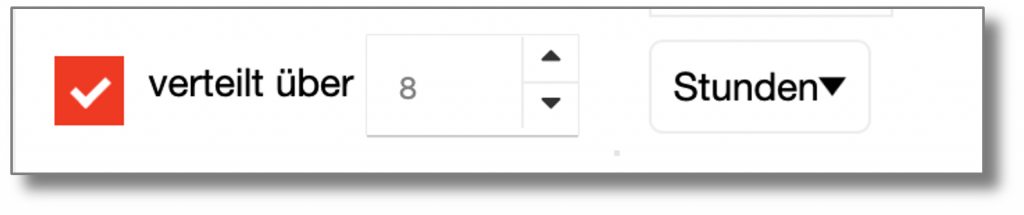
The purpose of distributing a delivery over several days or hours is to avoid peak loads and thus ensure that requests can be processed.
Even in the event of sending difficulties, it is advisable to spread sending over several hours to achieve a better sending result.
Tracking
Here you can determine whether and how clicks and openings are tracked. You can find more details in the Click & View Tracking chapter.