Insert elements
[MNR_ProductName] Newsletters are created from individual building blocks, which we call elements. The number of elements is manageable, but very powerful, because practically any conceivable layout can be created from just a few building blocks.
All elements are responsive and designed to be displayed in Microsoft Outlook the way you want - even without specialist knowledge.
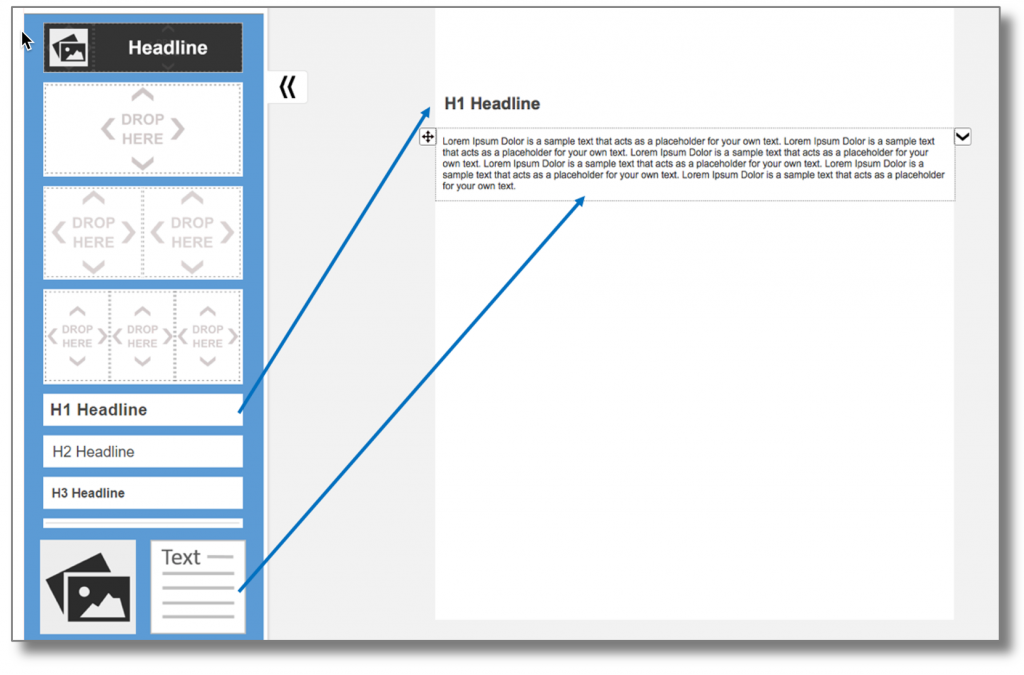
The newsletter elements are located on the left-hand side of the screen. You can simply drag and drop them onto your newsletter and edit them. To insert an element, click on it with the mouse, hold down the left mouse button and drag it onto the newsletter. A gray bar with the inscription "Element will be placed here" indicates the position at which the element will be inserted into the newsletter.

in this case an H1 headline and a text element.
Note: If the cursor is positioned over the background of your newsletter, the new element will be inserted at the end of the newsletter.
Context menu
If you right-click on one of the available elements, a context menu with the following options is displayed:

With the options Insert at the top resp. Insert at the bottom the element is inserted at the top or bottom of the newsletter.
If you have selected an element in your newsletter, the new element can be selected with Insert above the selected element about and with Insert under the selected element under the selected element.
If the selected element is a layout container, the element can also be inserted into the layout container.
In this way, elements can also be inserted into the newsletter without drag & drop.
Select and edit elements
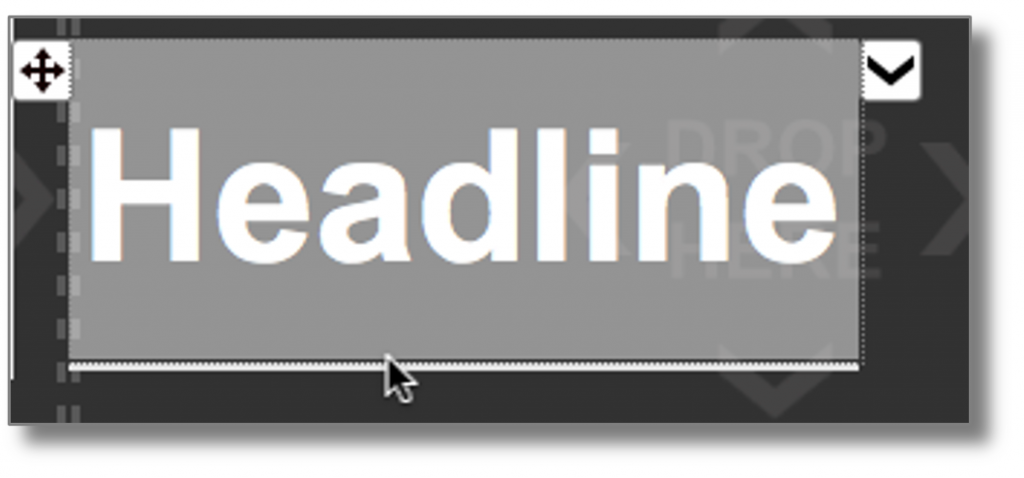
Click on an inserted element to select it for editing. A selected element is colored grey and surrounded by a frame. The controls for editing the style of the element are displayed on the right-hand side of the screen. The appropriate style editors are displayed for each element. A button with a cross appears at the top left of the element, which you can use to move the element.

The arrow button on the right-hand side of the element opens a menu with the following functions:
- Edit HTML - shows the HTML code of the element.
- Duplicate - duplicates the element and positions it directly under the selected element.
- Move - With the movement functions, an element can simply be moved up/up or down by one element, or even placed all the way up or all the way down.
- Save as a separate element - saves the element for later use in the list of elements on the left-hand side. In this way, you can reuse elements when you design a new newsletter.
- Delete - Removes the selected element
Change element height

To change the height of an element, move the cursor to the bottom edge of the element until a north/south arrow appears. Press the left mouse button, hold it down and then move the mouse to change the height. Alternatively, you can also change the height in the style editor on the right-hand side.
